Steps
STEP 1
Cut two 18-1/2" long sections from the 1 x 8 board.
Tools
Materials
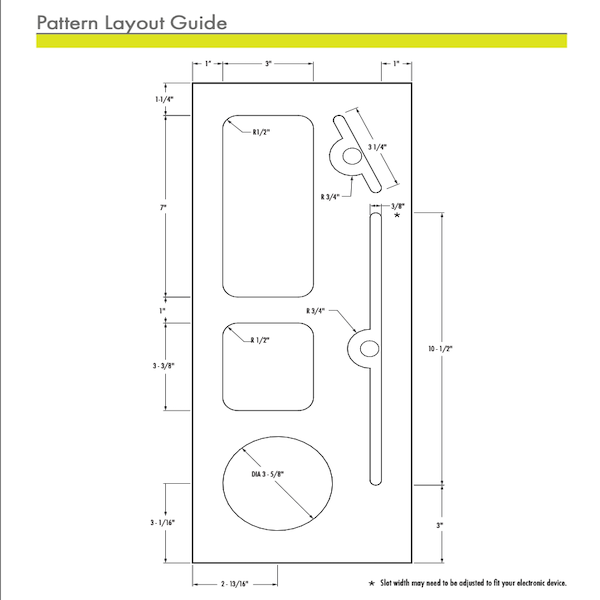
STEP 2
Draw the pattern onto one of the boards using the pattern layout guide. Drill a 3/8" hole into each of the pockets so the Jig Saw blade can pass through. Use a Jig Saw to cut out each pocket. Sand the cut marks with a rotary tool.
Tools
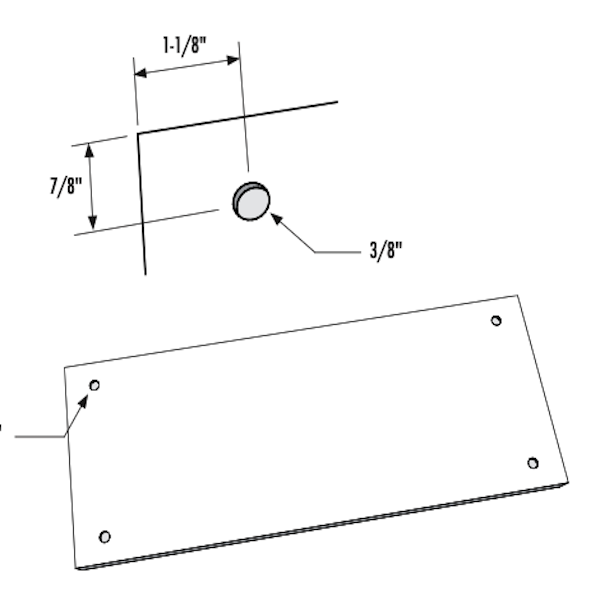
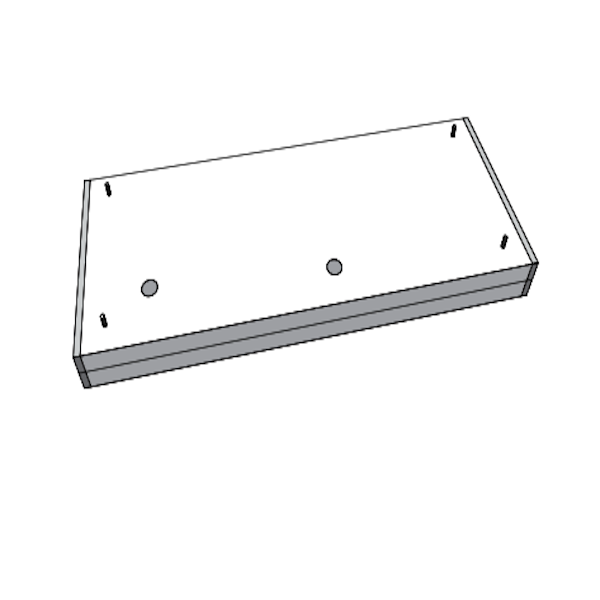
STEP 3
Mark a drill point in each corner of the 2nd board using measurements from the diagram. Using a Countersink Bit, drill a shallow hole about 1/8” deep. The hole depth needs to only be deep enough for the recess knob screw head.
Tools
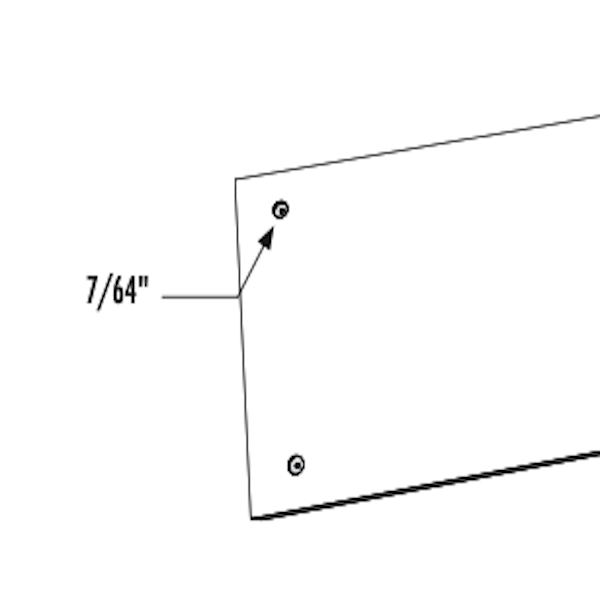
STEP 4
In the center of each hole, drill a 7/64” hole through the board.
Tools
STEP 5
Install the screws for each of the knobs. Recess each of the screw heads into the boards.
Tools
STEP 6
Align the top board over the bottom board. Apply glue in between each board and nail from the bottom side.
Tools
Materials
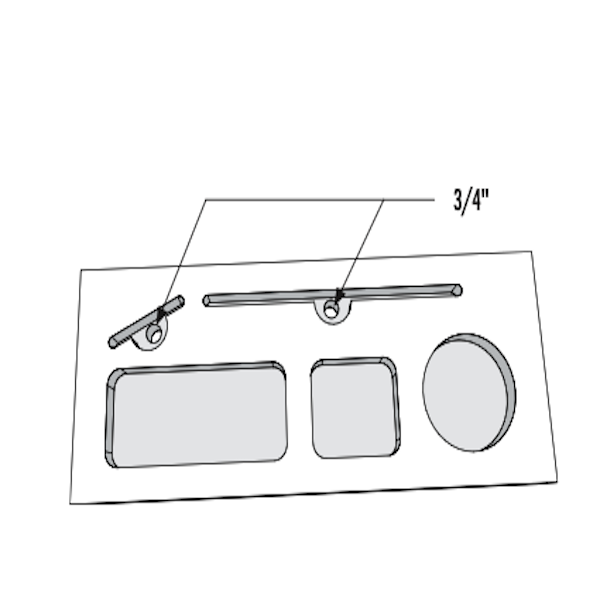
STEP 7
Using a 3/4" Spade Bit drill through bottom board. Hole should be centered and at the back edge of slot.
Tools
STEP 8
Mark a line 1/4" from each end and cut. This will clean up both ends and create a 1” offset around the pockets. Make sure to cut outside of the line. Place boards on the Miter Saw with the screws facing upward.
Tools
STEP 9
Sand the charging station and apply finish coat as desired!