Steps
Step 1
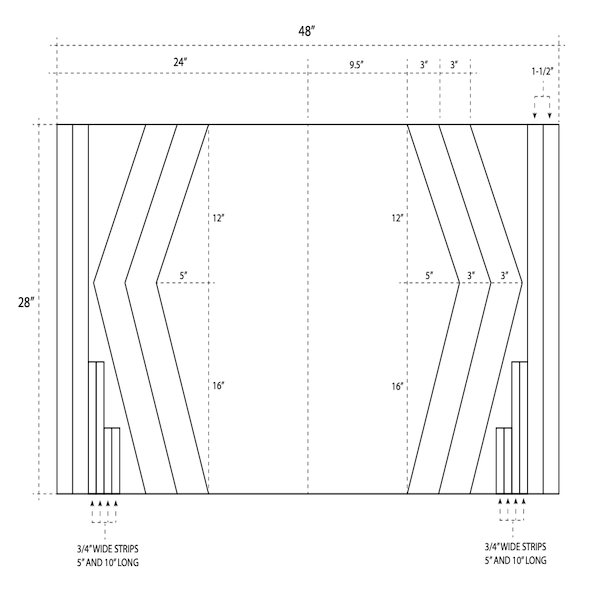
Measure and mark your plywood according to the Project Plan PDF. Use a glass plate to mark any round edges needed.
Tools
Materials

Step 2
Make all the cuts. Use a circular saw for the straight cuts, and a jig saw for the curved cuts.
Tools
Step 3
Round off the sharp corners on the table-top using the plate method and a jig saw.
Tools
Materials
Step 4
Clamp table legs together and sand out any discrepancies between the legs.
Tools
Materials
Step 5
Using your circular saw, cut the 1-1/2" strips of plywood to length. These will be used to attach the legs to the table top.
Tools
Step 6
Using your jig saw, round off the edges of the table legs. Refer to the linked project video for example. Then, clamp the table legs together and sand to make even.
Tools
Materials
Step 7
Sand all pieces to 220 grit. Use a router to round-over the edges of your table top if desired.
Tools
Step 8
Glue a spacer piece of plywood in between two of the supports. Drill a hole through a longer support into the spacer between the shorter supports, so that they are directly in the middle of the longer support. Repeat with remaining supports.
Tools
Materials
Step 9
Sandwich the top of the legs in between the open end of the shorter supports. Two of the legs will be sandwiched between the ends of the parallel, longer supports. Screw in place to ensure they are secure.
Tools
Materials
Step 10
Glue thin strips of plywood together to create additional supports for the legs. Glue these supports into the narrowest part point of the legs, and secure with screws.
Tools
Materials
Step 11
Place the table top upside down on a flat surface. Screw the top supports into the bottom of the table top to attach the legs to the table top. Ensure that your screws are long enough to secure the pieces, but not so long they will break through the top.
Tools
Materials
Step 12
Stain or finish to your liking!